
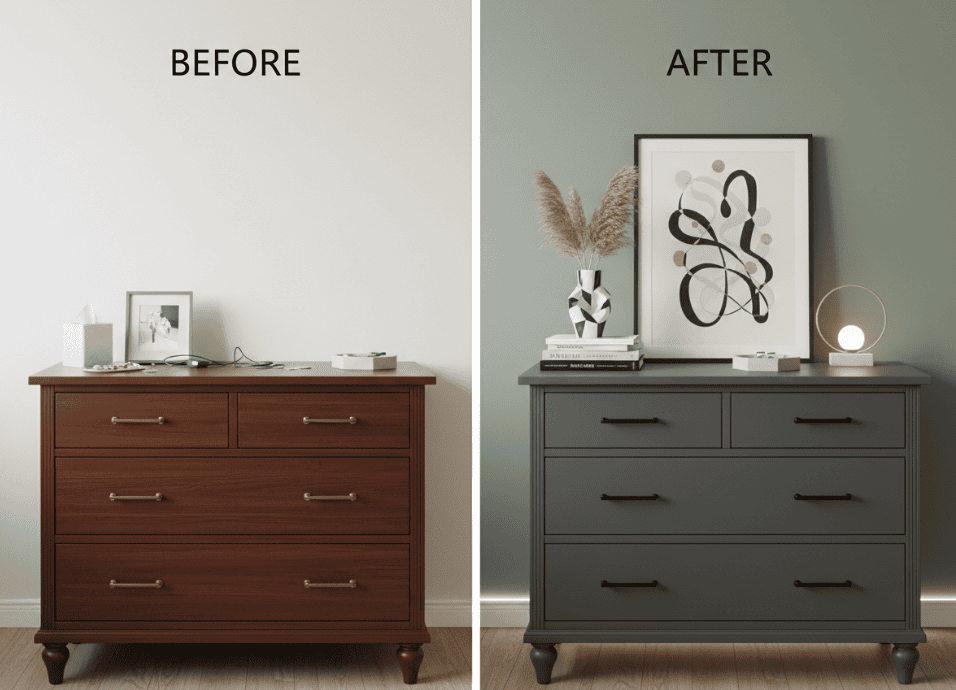
These three dresser makeover ideas started with a question from my friend Dana: Could AI show her how a piece might look before she bought the paint? Dana refinishes about two dressers a month for her weekend furniture-flipping business. We wanted to see how much a coat of paint, a new finish, or a hardware swap could change a dresser worth keeping. So we put three looks to the test on the same piece: sage and brass, stencilled navy, and distressed cream.
The Dresser Makeover Ideas We Wanted to Try
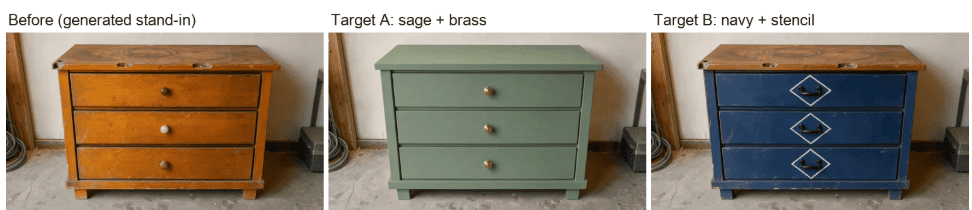
I didn’t use a photo of anyone’s real furniture. I generated a neutral “before” photo of a worn dresser in a garage with a separate image model, plus two still images of the finished looks we were weighing up:
- Option A: smooth matte sage green, holes in the top filled, brushed brass knobs.
- Option B: deep navy chalk paint, a white diamond stencil on each drawer, black pulls, and the top sanded back to bare wood.
Those three stills cost about two cents in total. The “after” images were not perfect, which turned out to matter later. Option A came out exactly as described. Option B ignored my request to sand the top (it kept the old worn top, dents and all), used bail handles instead of cup pulls, and gave each drawer one diamond rather than a repeating pattern.
The stand-in “before” photo and the two target looks, made as still images first.
Then I fed those into Gemini Omni 1.2 Flash, a video model that can start from a photo, move between a first and a last image, or edit an existing clip. Every clip below is 16:9 and 720p unless noted, and each comes back with a soundtrack. I asked for quiet workshop room tone, the levels came back low, and I muted them anyway.
Test 1: What Happened When We Started With One Photo
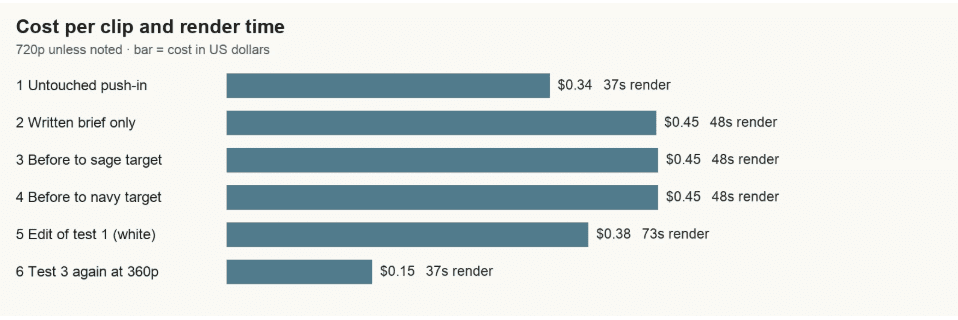
First, a slow camera push toward the dresser with nothing altered. It passed: the same three odd knobs, the same holes in the top, the same rings in the varnish, all the way through six seconds. It cost $0.34 and took 37 seconds to render.
Test 2: Previewing Dresser Makeover Ideas With Before and After Images
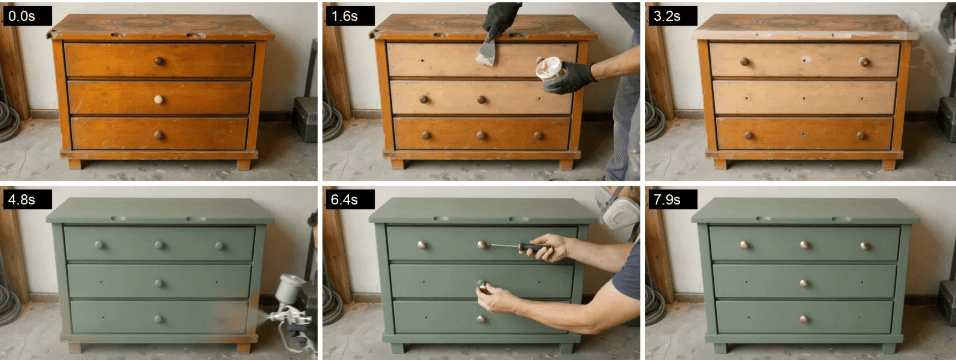
Next I gave it only the “before” photo and a written brief: sand it, fill the holes in the top, paint it sage green, swap the knobs for round brass ones, keep the shape identical.
The result is fun to watch. The model invented a pair of gloved hands with a scraper and a paint pot, then someone in a respirator with a spray gun, then a screwdriver fitting the knobs. But it didn’t follow the brief. The holes in the top are still there at the end. The top drawer finished with three brass knobs while the lower two have one knob each plus two empty screw holes. As a preview of what my dresser will look like, that’s misleading.
Written brief only: lively, but the hardware and the top don’t match what I asked for.
Test 3: Before Photo to Target Image, Sage Green
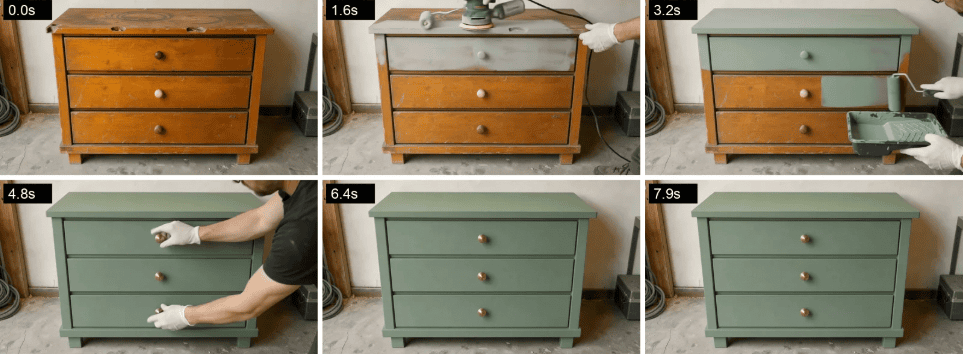
This is the mode that made the whole idea work. Instead of describing the finish, I gave the model the “before” photo as the first frame and the sage “after” image as the last frame, with a short prompt asking for a time-lapse makeover.
It lands exactly on the target: filled top, one brass knob per drawer, same proportions, same garage. Along the way it invented a worker with a sander and a roller, which makes it a nicer clip to share. It cost $0.45 and took 48 seconds.
For anyone who wants to try this themselves, the model page for the Gemini Omni 1.2 Flash API documents the options I used: 3 to 15 second clips (up to 10 with first and last frames), 360p to 4K, landscape or portrait, first and last frame images, and editing or extending an earlier clip. The listed price at 720p was $0.06 per second, and I was billed slightly under that, about $0.056 per second.
First and last frame: the clip ends on the exact look I planned.
Test 4: Before Photo to Target Image, Navy with Stencil
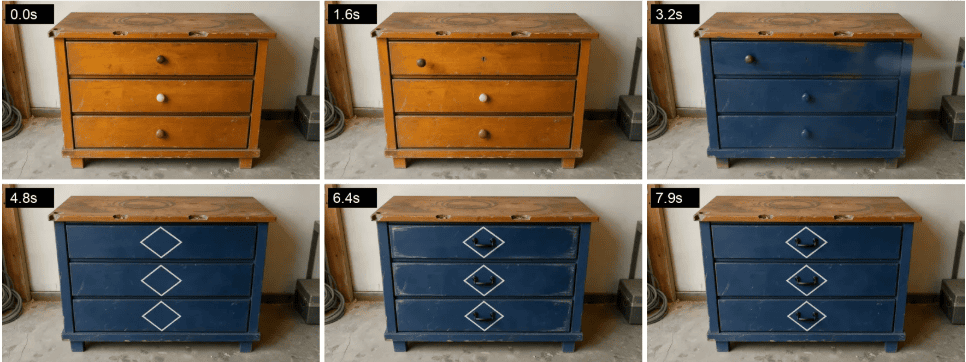
Same method with Option B. The navy spreads like spray mist, then the diamonds and pulls appear. It is faithful to the target image, which also means it faithfully kept every flaw of that image: the old dented top I wanted sanded is still there, and so are the bail handles.
That’s the main lesson of the day. With a last frame, the video is only as accurate as your “after” image, so check that still carefully before you spend money animating it. Same cost and time as Test 3.
Faithful to the target, including the top I forgot to fix in the target image.
Test 5: Editing an Existing Clip into a Third Option
Dana then asked about a third look: warm off-white chalk paint with distressed edges, a dark walnut top and pale blue ceramic knobs. Rather than starting again, I asked the model to edit the Test 1 clip.
The camera move was kept and the colours are lovely, but this is no longer our dresser. It now has three knobs on every drawer, the gouges and holes in the top have vanished, and the proportions shifted. It’s a beautiful dresser, just not the one in the garage. It also took the longest (73 seconds) and cost $0.38, a bit more than generating six seconds from scratch. I’d use this mode for loose inspiration only.
Video edit: a nice result, but the hardware layout and the top changed.

Test 6: The Cheap Draft
Finally I re-ran Test 3 at 360p. It cost $0.15 instead of $0.45, rendered in 37 seconds, and still ended on the right sage dresser with brass knobs. It’s too soft to post, but it’s plenty for deciding between colours. My advice: draft at 360p, then re-render only the winner at 720p.
Cost and render time for all six clips.
What It Costs to Test the Dresser Makeover Ideas
Six clips came to $2.20, plus about two cents for the three still images. All six jobs succeeded on the first try, with nothing to retry. Total render time was under five minutes.
Take the Preview Back to the Workshop
Once you’ve picked a look, try a paint sample on the back of a drawer and check it in the light where the dresser will live. The time-lapse skips the work that makes a finish last: cleaning, sanding or deglossing, filling gouges, and letting each coat dry. If you’re going from orange varnish to pale sage or cream, check whether you need a stain-blocking primer. Keeping a sturdy dresser and changing what you see is the same idea behind our sustainable home renovation guide.
If you flip furniture, label any preview you share as a design concept and photograph the finished dresser for the listing. The mock-up can help you decide whether the brass knobs or the walnut top are worth buying supplies for. The finished piece is where you get to see what that old dresser could become in your hands.
